Pages

Showing posts with label holidays. Show all posts

Sunday, April 6, 2014

Crab Deviled Eggs


Here's a twist on the traditional deviled egg. Mark made these for lunch today and they were delicious. This would be a great way to use those colored Easter eggs you'll have in a few weeks!

Crab Deviled Eggs
6 eggs, hard boiled*
1/4 cup lump crab meat
1 tablespoon mayonnaise
2 cornichons, chopped**
1 1/2 tablespoons dijon mustard
1/4 teaspoon salt
about a teaspoon of Old Bay seasoning (for garnish)

*Here's my method for hard boiled eggs (learned this one from my mom). Place the eggs in a medium pot, cover with water, top with the lid and cook over medium heat. When the water starts to boil, turn the heat completely off. Leave the lid on and set a timer for 12 minutes. Allow the eggs to simply sit in the hot water for 12 minutes. Then pour the hot water out of the pot and run cold water over the eggs. Store cooked eggs in the refrigerator until ready to use. 

**Cornichons are little mini pickles. You'll find them in the aisle with the pickles and olives at your local market. If you don't have cornichons, you could substitute dill pickles.


Now… to make the crab deviled eggs…
Cut each egg in half lengthwise. Remove the cooked yolks and place in a medium bowl. Stir in the crab, mayo, cornichons, dijon, and sat until creamy. Transfer the crab mixture to a large ziplock bag or a piping bag. Snip off the corner of the bag to for a hole about 1/2 inch in diameter. Pipe a bit of the crab mixture into each egg white. Sprinkle Old Bay seasoning on each egg.

Enjoy!

Thursday, March 27, 2014

Gluten-Free Chex Mix

Need a snack while you're watching the NCAA college basketball tournament this weekend? This one is easy, delicious, and gluten-free.


Gluten-Free Chex Mix
3 cups rice chex
3 cups corn chex
1 cup pecans
1 cup almonds
2 cups gluten-free crackers or pretzels
1 1/2 sticks butter, melted
4 tablespoons worcestershire sauce
3 teaspoons garlic powder
3 teaspoons onion powder
2 teaspoons salt
1 teaspoon paprika
1/2 teaspoon turmeric
6 dashes tabasco

Stir together, place in roasting pan, bake at 250 degrees for 2 hours. Stir every 15 minutes.

Enjoy!

Friday, March 14, 2014

Pi(e) Cupcakes


Happy Pi Day!! March 14th is Pi day… get it! 3.14… In honor of this mathematical day, I made these pi(e) cupcakes and some simple cupcake toppers with fondant and edible marker. Here's how…


What you'll need:
cupcakes - any flavor you like (try chocolate marshmallow cupcakes)
frosting - any flavor you like (try hazelnut frosting)
M&M candies - red candies work best to look like berries, but you can use blue too
piping bag and tips (optional)*

* if you don't have a piping bag with various tips, you can simply use a ziplock bag with the corner snipped off

Lightly frost a cupcake. Place M&Ms on the frosting with the "m" facing down. Place a small amount of frosting in your piping bag fitted with a small round tip (or in a ziplock bag with a very small hole snipped in one corner). Pipe a set of parallel lines over the M&Ms, then another set diagonally across the first set.
    

Change to a larger flat tip if you've got it, or snip a larger hole in the corner of your ziplock bag. Pipe a zig-zag in a circle around the edge of the cupcake to look like the pie crust.


Enjoy!

Monday, March 3, 2014

King Cake Bars


It's time for Mardi Gras! I usually make a king cake for Mardi Gras each year. Somehow Emily always seems to get the hidden baby, which should mean that she has to make the cake the next year. But I'm always the one that makes the cake. Oh well, I really don't mind. This year I stumbled across a recipe for king cake bars. They are much easier to make than traditional king cake (no rising time or anything) and slightly cheesecake-ish. They are also absolutely luscious and delicious. Perfect for your Mardi Gras party - or any time! We'll be snacking on these after our jambalaya dinner.


King Cake Bars
for the bars…
1 cup all-purpose flour (use gluten-free if you like)
1/2 cup (1 stick) cold butter, cut into pieces
3 tablespoons sugar
1 tablespoon milk
1 package (8-ounces) cream cheese, softened
1/2 cup sugar
1 egg
1 teaspoon vanilla
1/2 teaspoon cinnamon

for the glaze…
1/2 cup powdered sugar
1 tablespoon milk
Colored sugar in the traditional Mardis Gras colors… purple, green and gold (optional)


Preheat your oven to 350 degrees. Line an 8x8 or 9x9-inch square baking pan with foil, allowing some overhang, and spray foil with non-stick cooking spray.

Using an electric mixer (a stand mixer if you have one), mix the flour and 3 tablespoons of sugar. Drop in the butter cubes and beat on low speed until the mixture is crumbly and looks a bit like wet sand. (If you don't have an electric mixer, you can do this by hand. Mix the flour and sugar, then add the pieces of butter, using two knives or a pastry cutter to blend in the butter until it resembles course crumbs.) Add the milk and beat until it starts to stick together. Your mixture should look like this.


Sprinkle the mixture into the prepared pan and press it into an even layer covering the bottom of the pan.

You can reuse the same bowl and mixer (bonus for limit dirty dishes) for the next step. Beat the cream cheese, 1/2 cup sugar, egg, vanilla, and cinnamon together until smooth. Spread the mixture evenly over the prepared crust in the pan. 


Bake the bars for 25 minutes or until the cream cheese mixture is set.


Prepare the glaze while the bars are baking. Whisk together the powdered sugar and milk until completely smooth. Spread the glaze in an even layer on top of the bars as soon as you remove them from the oven. Immediately decorate with colored sugar. Cool completely and slice with a sharp knife.


Enjoy!

Thursday, November 21, 2013

Pumpkin Fudge


This is one of my all-time favorite fudge recipes. I love just about anything with pumpkin. I make this fudge every year around the holidays. Give it a try and add it to your Thanksgiving dessert spread. It will definitely be part of mine.


Pumpkin Fudge
3 cups sugar
3/4 cup butter
2/3 cup evaporated milk
1 cup canned pumpkin puree
2 tablespoons corn syrup
2 1/2 teaspoons pumpkin pie spice
9 oz. white chocolate, chopped
7 oz. jar marshmallow crème
1 teaspoon vanilla extract
ground cinnamon, for sprinkling (optional)


Line a 13 by 9 inch baking pan with foil, allowing extra to hang over the sides of the pan. Spray with non-stick cooking spray.

In a large heavy saucepan, (I use the biggest one possible so I don't boil it over and get it all over my stove. I've boiled thing over about a hundred times. My stove takes a beating because things are always boiling over in my kitchen... I spend a lot of time cleaning up after myself.) Back to the fudge... In a large heavy saucepan, heat the sugar, butter, evaporated milk, pumpkin puree, corn syrup, and pumpkin pie spice and bring to a boil. Heat to 234 degrees on a candy thermometer (soft ball stage if you're a pro like my mom and can just "tell" when it's at soft ball stage). Remove from heat and stir in the chopped white chocolate, marshmallow creme, and vanilla.

Pour the fudge into your prepared pan and sprinkle the top with a little ground cinnamon. Let the fudge sit at room temperature for about 2 hours or until firm. Lift the fudge out of the pan all at once using the foil overhang. Place on a cutting board and cut the fudge into 1-inch pieces using a sharp knife.

Enjoy!


slightly adapted from Annies-Eats.com

Monday, November 4, 2013

Whole Wheat Cream Cheese Filled Pumpkin Muffins


Oh I LOVE pumpkin!!!! I think I've mentioned this before. I could eat pumpkin everything this time of year... waffles, pancakes, cookies, soup, cappuccinos, bread, and MUFFINS! I found a recipe for a rather healthy pumpkin muffin - perfect for breakfast (from one of my favorite food bloggers - Annie's Eats). You don't have to feel guilty about these muffins. They have whole grains, fruit and veggies, and just a little sugar and oil (just a little won't hurt).


Whole Wheat Cream Cheese Filled Pumpkin Muffins
for the filling...
4 ounces (1/2 package) cream cheese, softened
1 tablespoon honey

for the muffins...
2 eggs
3/4 cup sugar
1 cup pumpkin puree
1/4 cup canola oil
scant 1/2 cup applesauce
1 1/2 cups whole wheat flour
1 teaspoon cinnamon
1 teaspoon nutmeg
1/2 teaspoon cloves
2 teaspoons pumpkin pie spice
1/2 teaspoon salt
1/2 teaspoon baking soda

for the crumble topping...
2 tablespoons whole wheat flour
3 tablespoons quick oats
1 1/2 tablespoons sugar
1/2 teaspoon cinnamon
2 tablespoons butter, cold, in pieces

Preheat your oven to 350 degrees. Prepare a 12-cup muffin pan with paper liners.

First make the cream cheese filling. Whisk together in cream cheese and honey in a medium bowl until smooth (you can use an electric mixer to make it easier). Transfer the filling to a large ziplock bag or pastry bag and set aside.

Next make the crumble topping. In a medium bowl, whisk together the flour, oats, sugar, and cinnamon. Add the butter in pieces and use clean fingers to blend the mixture into a crumble. Set aside.

In a large bowl, whisk together the eggs, sugar, pumpkin, oil, and applesauce (you can use an electric mixer again for this part if you want). Blend until smooth. Add the flour, spices, salt, and baking soda to the mixture and blend until completely mixed.

Fill each muffin cup about 1/3 full with muffin batter. Snip a hole in the corner of the ziplock bag (or pastry bag) and squeeze a dollop of cream cheese filling on top of the batter in the center of each muffin cup. (I suppose you could also just drop it in with a spoon, but this method just seems much easier to me.) Divide the remaining batter among the muffin cups, topping each dollop of cream cheese with batter. Sprinkle the crumble topping on each muffin.


Bake at 350 degrees for about 20 minutes. Remove from the oven and allow to cool in the pan for about 5 minutes. Remove from pan and cool completely on a wire rack.

I think these go perfectly with a cup of Chai Tea or a Pumpkin Cappuccino. Enjoy!


slightly adapted from Annies-Eats.com

Tuesday, October 29, 2013

Baked Pumpkin Donuts


I love this time of year... I don't really love the chill in the air (I must admit that I really would rather wear shorts and hand out by the pool every day. I love hot weather.)... but I do love the flavors that come with this season - warm cinnamon and pumpkin. Yumm! These little donuts are so easy to make and not as bad for you as that fried donut from your favorite coffee shop. I enjoy mine with a little chai tea latte - a pumpkin spice one!


Baked Pumpkin Donuts
1/2 cup canola oil
3 large eggs
1 1/2 cups granulated sugar
1 1/2 cups pumpkin purée
1 1/2 teaspoons pumpkin pie spice
1 1/2 teaspoons salt
1 1/2 teaspoons baking powder
1 3/4 cups + 2 tablespoons flour

Preheat your oven to 350 degrees. Lightly grease the wells of a donut pan.

In a large bowl, whisk together the oil, eggs, sugar, pumpkin puree, spice, salt, and baking powder (using an electric mixer if you have one) until smooth. Add the flour and stir to combine.

Spoon some batter into the wells of your donut pan, filling them about 3/4 full. You'll likely have enough batter for about 12. 

Bake for 15 to 18 minutes at 350 degrees. Remove from the oven and cool on a wire rack. Top with a little maple frosting or a dusting of cinnamon sugar.


To make maple frosting, combine 1 cup powdered sugar, 2 teaspoons water, 2 teaspoons maple syrup, 1/2 teaspoon maple extract in a bowl until smooth. Add water a few drops at a time if needed to thin. Drizzle the frosting on the donuts or spread on with a knife.

Enjoy!


adapted from KingArthurFlour.com

Saturday, December 22, 2012

Vanilla Marshmallows

If peppermint isn't your favorite flavor, try these vanilla marshmallows. The recipe is almost identical to the peppermind marshmallow recipe I posted recently. You can whip them up rather quickly and they will make your Christmas hot cocoa just a little bit more luscious. I bet Santa wouldn't complain if you left him a little on Christmas Eve with some cookies and hot cocoa.


Homemade Vanilla Marshmallows
1/2 cup powdered sugar
1/3 cup corn starch
2 envelopes unflavored gelatin
2/3 cup water
1 1/3 cups granulated sugar

2/3 cup light corn syrup
1/8 teaspoon salt
2 teaspoons vanilla extract
Into a small bowl, sift together the powdered sugar and cornstarch. Line a 13x9 pan with foil and coat with non-stick spray. Sift about 2 tablespoons of the sugar cornstarch mixture into the pan, tilting the pan to coat the sides. Leave any excess in the pan.

Place 2/3 cup of water in a large bowl (preferably the bowl of a stand mixer). Sprinkle with gelatin and let soften for about 5 minutes.

In a medium saucepan, heat sugar, corn syrup, and salt over medium heat until the sugar is melted and the temperature of the mixture reaches 240 degrees on a candy thermometer (about 7 minutes). Stir occasionally. Add the melted mixture to the bowl of the stand mixer in a slow steady stream with the mixer running on the lowest speed. Add the vanilla.

Then, switch to high speed and beat with the mixer until light and fluffy (about 10 to 15 minutes). Spread the mixture into the prepared pan and smooth top with a spatula. Dust the top with 2 tablespoons of the sugar cornstarch mixture. Let set at room temperature for at least 3 hours.

Lift the marshmallow from the pan using the foil. With a knife, cut into 1 inch pieces (you can also use a cookie cutter to cut shapes). Dip the knife or cookie cutters in some of the remaining cornstarch sugar mixture to prevent sticking.
Toss the cut marshmallows in the remaining cornstarch sugar mixture. Store covered at room temperature. Enjoy!!

Sunday, December 16, 2012

Homemade Peppermint Marshmallows

Christmas is quickly approaching. I love this time of year! I love all the yummy baked goods, fun flavors, and sweet Christmas treats. There are a few recipes that I make every year - this Peppermint Marshmallow recipe is one of them. Sometimes I send them off in packages to friends and family that don't live near by... and I always keep a few to enjoy with a little cup of hot cocoa. They are sweet, minty, and soft. The effort is worth it... they are much better than store-bought marshmallows.


Homemade Peppermint Marshmallows
1/2 cup powdered sugar
1/3 cup corn starch
2 envelopes unflavored gelatin
2/3 cup water
1 1/3 cups granulated sugar
2/3 cup light corn syrup
1/2 cup crushed candy canes
1/8 teaspoon salt

Into a small bowl, sift together the powdered sugar and cornstarch. Line a 13x9 pan with foil and coat with non-stick spray. Sift about 2 tablespoons of the sugar cornstarch mixture into the pan, tilting the pan to coat the sides. Leave any excess in the pan.

Place 2/3 cup of water in a large bowl (preferably the bowl of a stand mixer). Sprinkle with gelatin and let soften for about 5 minutes.

In a medium saucepan, heat sugar, corn syrup, candy cane pieces and salt over medium heat until the sugar and candy are melted (about 7 minutes). Stir occasionally. Add the melted mixture to the bowl of the stand mixer in a slow steady stream with the mixer running on the lowest speed.

Then, switch to high speed and beat with the mixer until light and fluffy (about 10 to 15 minutes). Spread the mixture into the prepared pan and smooth top with a spatula. Dust the top with 2 tablespoons of the sugar cornstarch mixture. Let set at room temperature for at least 3 hours.

Lift the marshmallow from the pan using the foil. With a knife, cut into 1 inch pieces (you can also use a cookie cutter to cut shapes). Dip the knife or cookie cutters in some of the remaining cornstarch sugar mixture to prevent sticking.

Toss the cut marshmallows in the remaining cornstarch sugar mixture. Store covered at room temperature.

Drop a few in a cup of hot cocoa or just pop them right in your mouth. Enjoy!
Wednesday, April 11, 2012

Spring Cupcakes

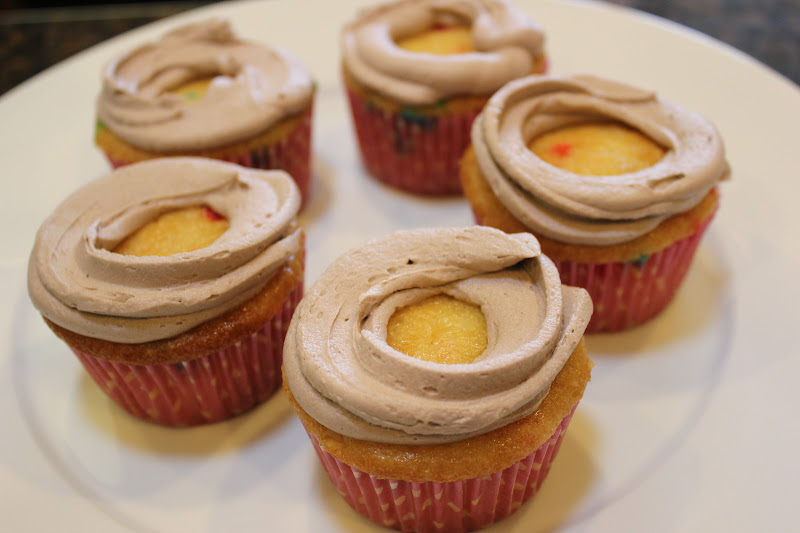
I made these cute little baby bird cupcakes on Easter, but you could use them for any kind of spring occasion or maybe a baby shower... They are not very difficult and they look so adorable! Try them out!


Baby Bird Cupcakes
prepared cupcakes (any flavor you like)
toasted coconut
buttercream frosting in light blue, yellow, black, and brown

First toast the coconut by placing it on a baking sheet that's been covered in foil. Bake at 350 degrees for about 7 minutes. Check it often because it browns very quickly. The toasted coconut is the perfect color for the bird nests.

For the buttercream frosting, cream together 1/2 cup softened butter, 2 cups powdered sugar, 1 teaspoon vanilla, 1/2 tablespoon water. Beat with an electric mixer until light and fluffy. Divide the frosting and prepare each color. I used Americolor and Wilton gel food colors.

Using a large tip, pipe a ring around each cupcake with brown frosting.

Sprinkle the toasted coconut onto the frosting. Pressing gently to be sure the coconut sticks.

Using a medium round tip on your piping bag, pipe small light blue mounds into the middle of the coconut "nest" you just made.


Use a small leaf tip to create the beak with yellow frosting.

 
Add tiny black eyes to each baby bird. I used Wilton's premade black icing tube.


Almost too cute to eat these will be a huge hit with kids and adults. Have fun! Enjoy!

inspired by MarthaStewart.com

Friday, April 6, 2012

More Easter Ideas

Who says sugar cookies are for Christmas?! I use my perfect sugar cookie recipe all year! I've shared it before so click here if you want to reference it: perfect sugar cookies. Here are some sugar cookies transformed into Easter eggs. You could chose to simply decorate these cookies with various solid spring colors or add some fun designs like flowers, zig-zags, polka dots, carrots... where ever your imagination takes you!


Enjoy!

Thursday, April 5, 2012

Get Ready for Easter

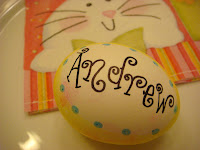
Easter is only a few days away so I thought I'd share a fun Easter idea. Here's a little twist on the standard colored Easter eggs. Use them as nametags for place settings at your Easter brunch, lunch, or dinner table.


I love the smell of coloring eggs. It must be something about the bit of vinegar and water mixed with the little dye tablets each in their own cup that brings childhood memories rushing back. To make a nametag like the one above, just any old set of Easter egg dye (Paz brand is usually available everywhere and it's very inexpensive).

First hard boil several eggs. I always use my mom's method for hard boiled eggs and they typically turn out perfectly. Place raw eggs in a medium pot, cover the eggs with water. Place a lid on the pot and heat over high heat until the water starts to boil. As soon as the water comes to a rolling boil, remove the pot from the heat. Keep covered and allow the eggs to sit in the pot with the water for 12 minutes. The remove the eggs and rinse with cold water.

Prepare multiple colors in a few cups according to the package instructions. For each egg, carefully dip the egg into the cup with the dye so that the long part of the egg is in the water about 2/3 of the way in. Do not dip the egg all the way into the dye or you won't have a clean, white area to write in. Hold the egg in the dye until the egg color is as dark as you want it. Remove the egg and allow the egg to dry for a few minutes.  Then chose a different colored dye and dip the egg in the same manner, but don't dip it in as far as you did with the first color. This will create a little ring or boarder around the white space on your egg.When we reach the color you want, remove from the dye and allow to dry completely.

  
Using permanent markers - I used Sharpies in a few different colors, but you could you all black if you want, Carefully write names in the white space of each egg. You can also used colored markers to add some details such as small polka dots around the edge of the white space.
     
 
Be creative and have fun with these little eggs. Surprise your family with personalized eggs! Enjoy!